A.4 Course Visual Guidelines
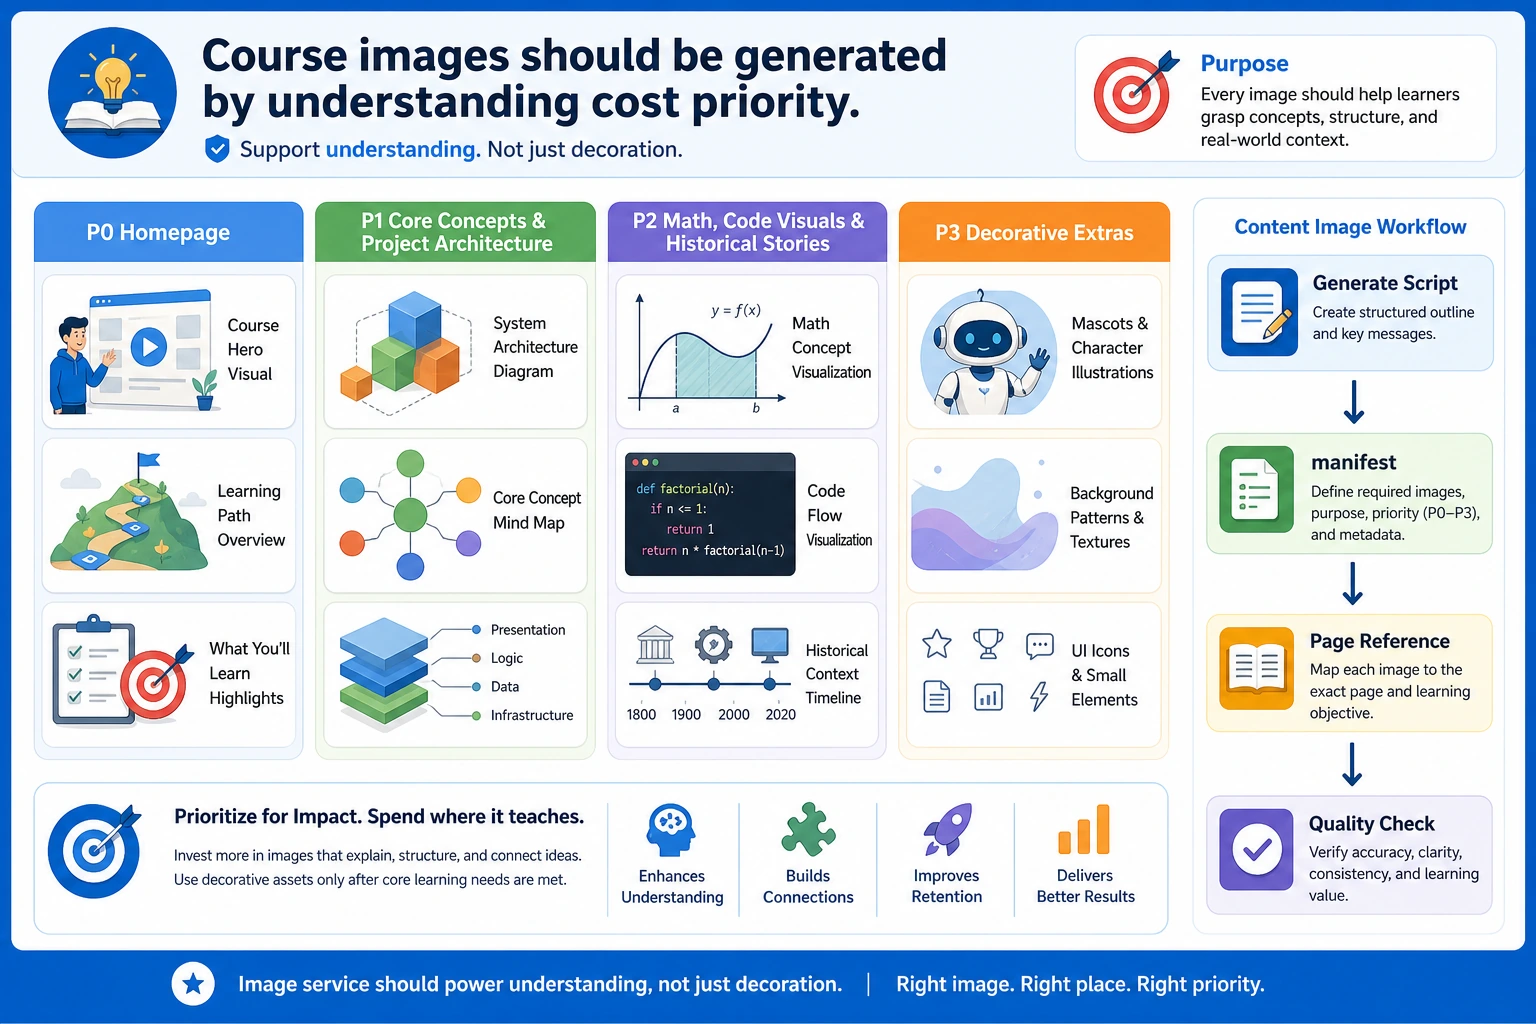
Images are teaching content, not decoration. Add or keep an image only when it reduces the learner’s thinking cost.
Review the learning depth first
Before changing a lesson, read the page as a learner and ask whether it supports three levels at the same time:
| Learner level | Page must provide | Warning sign |
|---|---|---|
| Beginner | A small runnable action, plain-language meaning, expected output, and a recovery path when it fails | The page defines terms but never shows what to run or inspect |
| Practitioner | Decision rules, common failure modes, evidence to keep, and a next project step | The page has a demo but no criteria for judging whether the result is good |
| Experienced learner | Trade-offs, edge cases, debugging signals, evaluation habits, or production constraints | The page feels like a glossary and offers no deeper question to think about |
If a page is too short, add depth around the learner bottleneck instead of adding more definitions. A good page lets a new learner finish one action and lets an experienced learner notice a design or evaluation issue.
Choose the right visual type
| Learning need | Best visual type | Keep text short |
|---|---|---|
| New concept, chapter entry, story, comparison | image2 teaching illustration or comic | Yes |
| Exact formula, coordinate, matrix, code execution order | SVG or code-generated chart | Yes |
| Real project result | Screenshot or generated mock result | Yes |
| Training curve, metric chart, distribution | Code-generated chart | Yes |
| Reference checklist | Compact table or diagram | Yes |
Mobile and three-language image rules
Choose the image direction from the teaching purpose. Use vertical 9:16 for step-by-step lessons, phone-first reading, and hard concepts that need stacked explanation. Use landscape for timelines, side-by-side comparisons, architecture maps, dashboards, or anything learners must scan horizontally. Use a compact square or near-square image only when the concept is a single object, pattern, or checklist. The goal is readable learning, not one fixed ratio.
Generate teaching images as a three-language group: Chinese, English, and Japanese. The group should share the same scene, layout, teaching goal, key values, and visual rhythm. Only the visible learner-facing labels, title, subtitle, and alt text should change by locale.
Use the filename pattern as one source group, then sync the published assets in the same pattern:
topic-name.png
topic-name-en.png
topic-name-ja.png

topic-name.webp
topic-name-en.webp
topic-name-ja.webp
After generation, follow the project’s current publishing style: convert or sync the image to WebP before referencing it from course pages. Reduce file size, but do not over-compress. Titles, labels, formulas, code snippets, axes, metric values, and arrows must stay legible on mobile. If compression makes content fuzzy or hard to read, keep a larger WebP or simplify the image before publishing.
When restructuring lessons, it is acceptable to add a clear placeholder first and generate the final image later. The placeholder must still record the teaching goal, target page, image direction, and the three-language filename group so the final batch generation stays consistent.
Do not add a new single-language image to only one locale unless it is a temporary placeholder with a clear follow-up. For exact numeric outputs, formulas, code order, or metric values, prefer an SVG or a generated-result group that locks the same data across all three languages.
Replace template-heavy SVGs
Some old SVGs are accurate but feel like repeated slide templates: colored boxes, arrows, and long text. For chapter entry pages and broad concept pages, prefer image2 PNGs with a clearer visual story.
Keep SVG when precision matters:
- matrix dimensions
- vector geometry
- terminal paths and commands
- Python evaluation order
- exact data/table shapes
Replace with image2 when the goal is intuition:
- Agent execution loop
- RAG application loop
- chapter-level roadmap
- project workflow
- historical turning points
- before/after comparison
Image insertion rhythm
Use this order inside teaching pages:
- Show the image.
- Run the smallest code or operation.
- Read the output or result.
- Explain only the part the learner just saw.
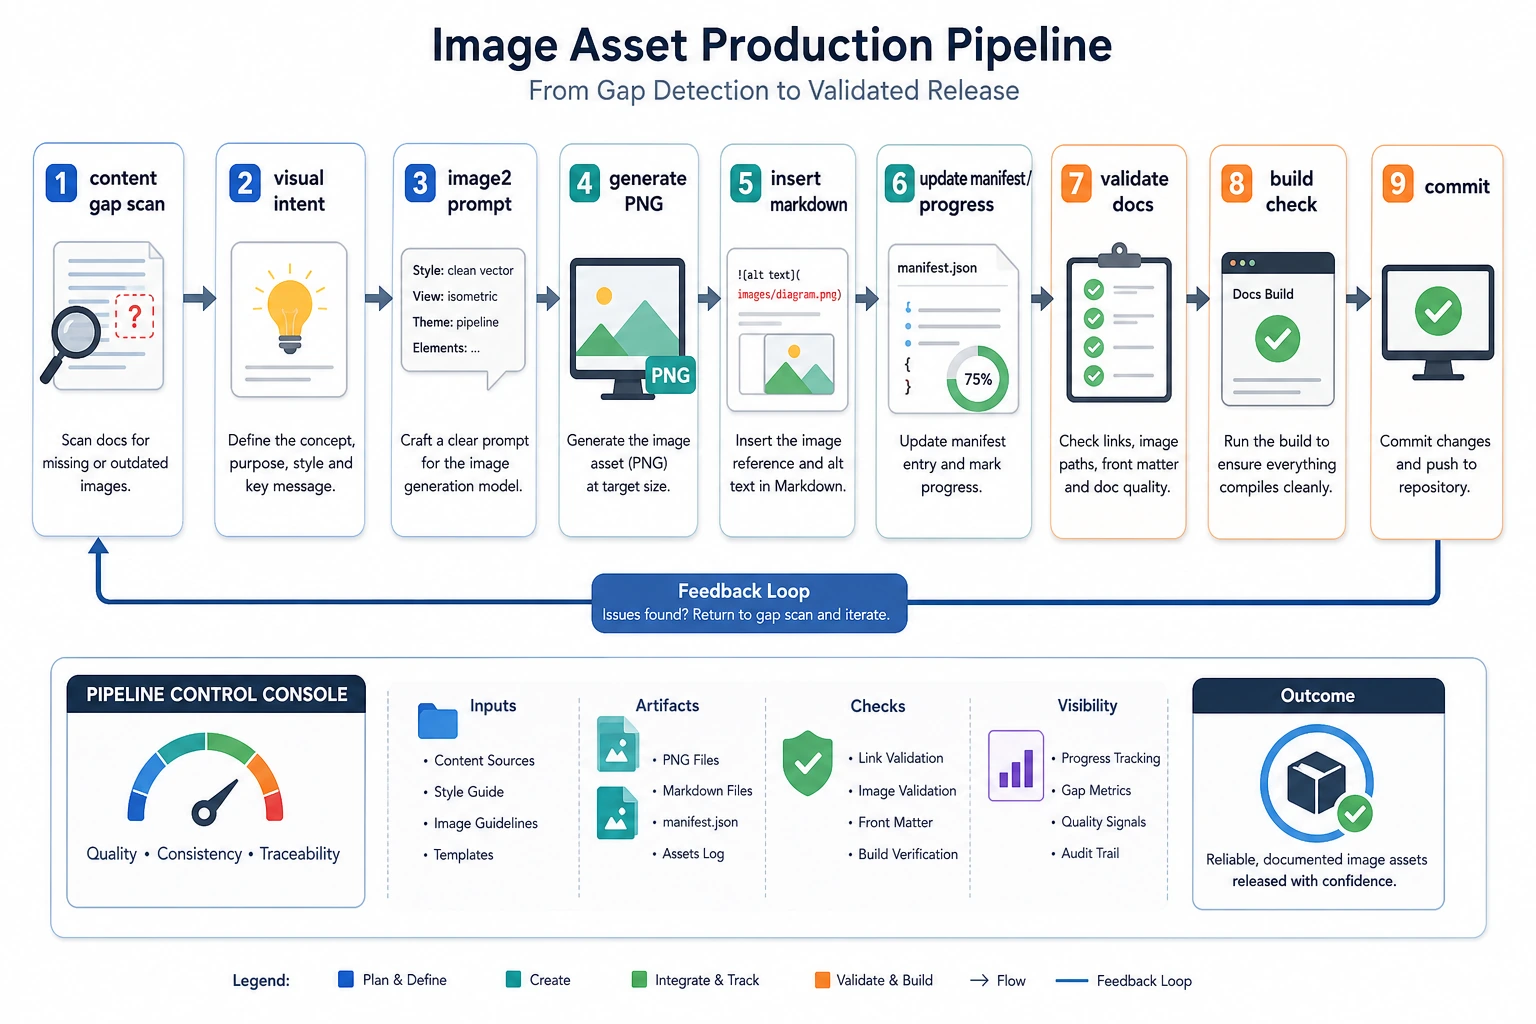
Minimal production loop
- Find the learner bottleneck.
- Define the visual intent in one sentence.
- Choose the image direction and ratio from the teaching purpose.
- Add a placeholder or generate/draw the right type of image as a three-language group.
- For final images, convert or sync the published course assets to WebP, keeping text and key details readable.
- Insert it in English, Chinese, and Japanese pages with matching alt text.
- Verify images resolve, mobile readability holds, and the site builds.
Do not add a picture just because the page looks empty. Add it because the next step becomes easier to understand.