10 Computer Vision (Elective Track)
This elective chapter answers a simple question: what does it mean for a model to see an image? Start with pixels, then move from coarse output to fine output: classify the whole image, locate objects, segment pixels, and finally connect vision to OCR, video, or multimodal systems.
If your main track is LLM apps and Agents, you can return later. If you care about OCR, industrial inspection, medical imaging, visual search, or multimodal products, study this chapter systematically.
See Vision Tasks By Output Granularity
Section titled “See Vision Tasks By Output Granularity”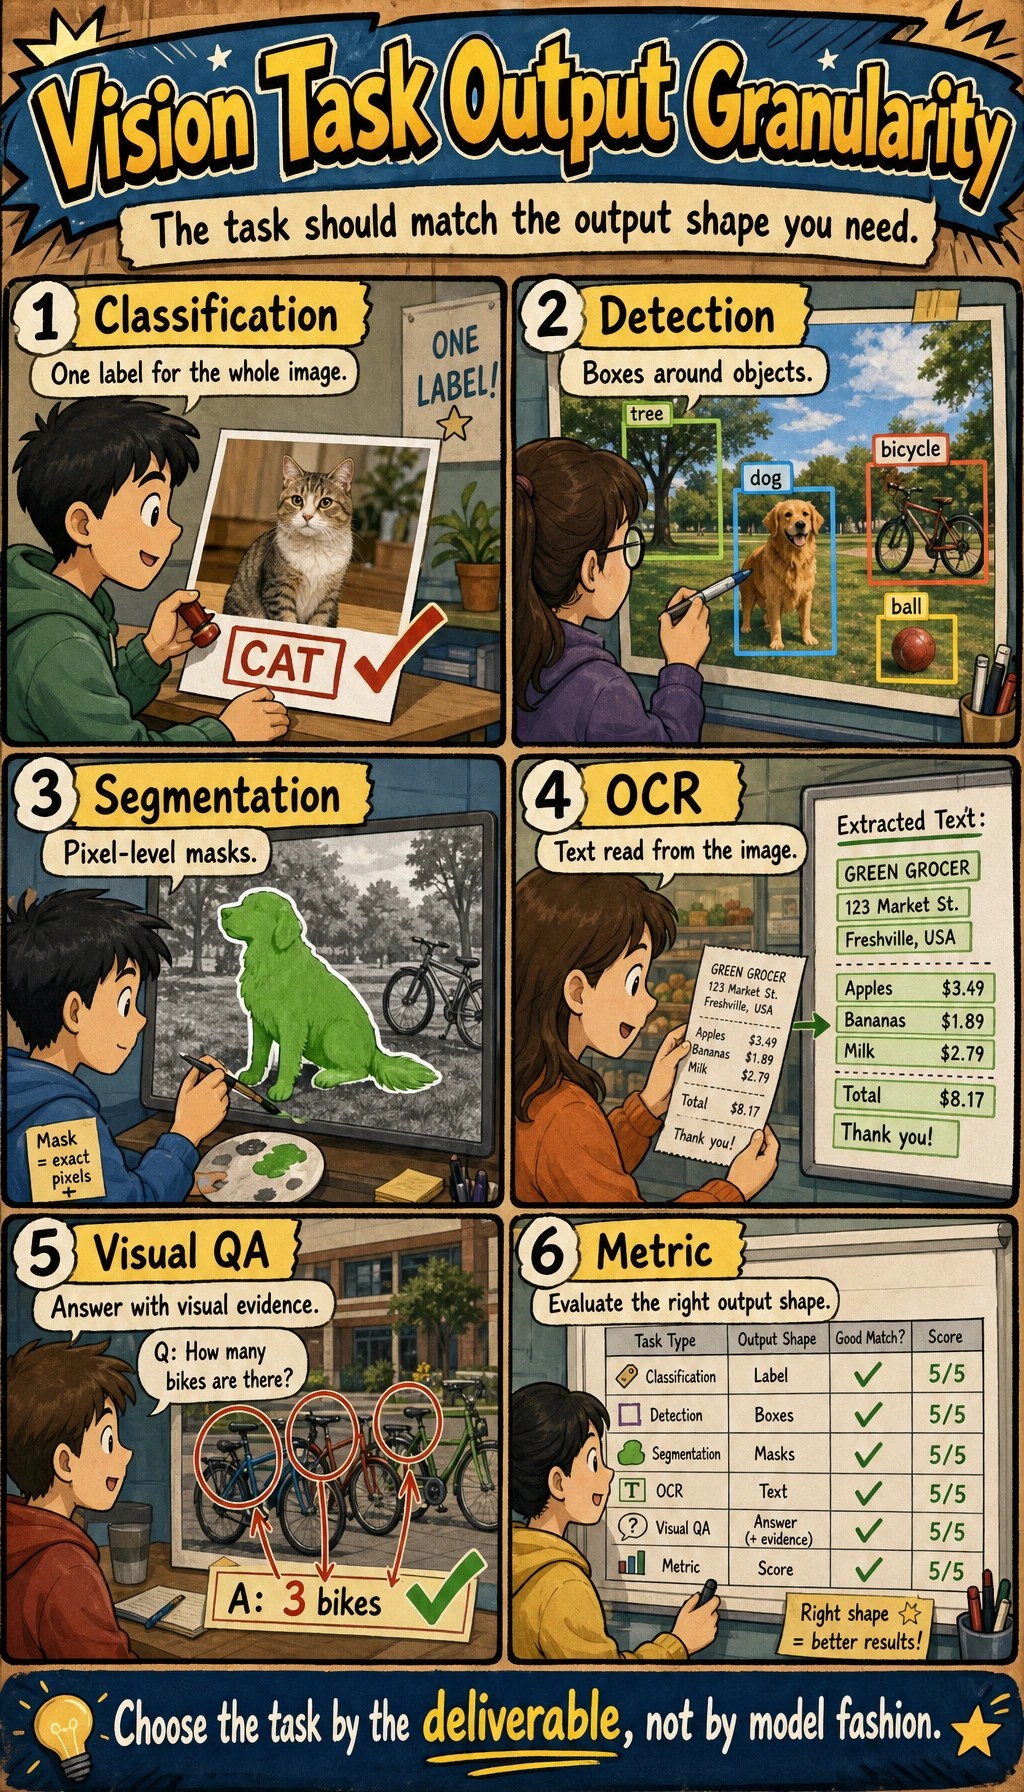
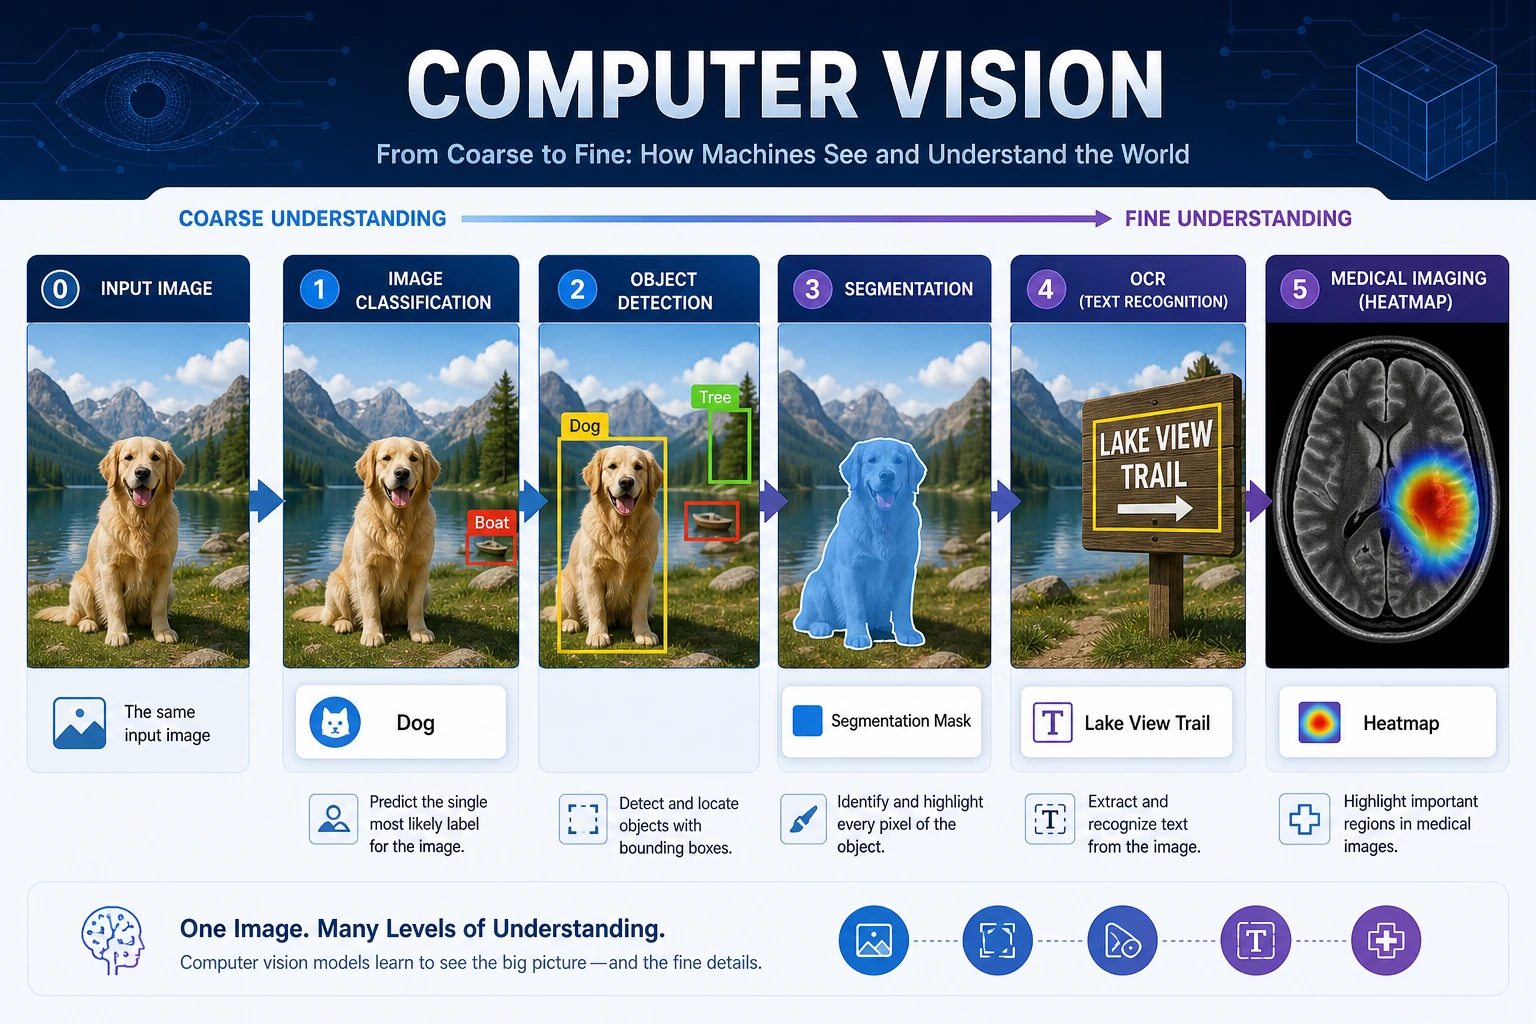
Ask three questions about the same image:
| Question | Task | Output |
|---|---|---|
| What is this image mainly about? | Classification | one or more labels |
| Where is each object? | Detection | boxes, labels, confidence |
| Which pixels belong to which object or region? | Segmentation | masks or pixel classes |
| What text or visual meaning can be extracted? | OCR / visual understanding | text, tables, descriptions, answers |
Learning Order And Task List
Section titled “Learning Order And Task List”Do the project after you understand the output type. The same image can become several different tasks.
| Step | Read | Do | Evidence to keep |
|---|---|---|---|
| 10.1 | Image basics and OpenCV | Inspect pixels, channels, resizing, grayscale, edges | input image, processed output |
| 10.2 | Classification | Run or train a small classifier | labels, accuracy/F1, failed images |
| 10.3 | Detection | Understand boxes, confidence, IoU, mAP, YOLO | prediction boxes and threshold notes |
| 10.4 | Segmentation | Understand masks and pixel-level labels | mask visualization and IoU/Dice notes |
| 10.5 | Advanced topics | Choose OCR, video, face, 3D, or medical direction only if needed | direction notes and scenario boundary |
| 10.6 | Stage project | Run 10.6.4 Hands-on: Build a Reproducible Vision Mini Pipeline | generated images, masks, boxes, metrics, failure report |
First Runnable Loop: Inspect Pixels Without Dependencies
Section titled “First Runnable Loop: Inspect Pixels Without Dependencies”This zero-dependency lab creates a tiny color image, converts it to grayscale, and saves files that most image viewers can open. It teaches the core idea: an image is structured numeric data.
Create ch10_pixel_lab.py and run it with Python 3.10 or later.
from pathlib import Path
width, height = 8, 8
pixels = [    [(x * 32, y * 32, 128) for x in range(width)]    for y in range(height)]
gray = [    [round(0.299 * r + 0.587 * g + 0.114 * b) for r, g, b in row]    for row in pixels]
ppm_body = "\n".join(" ".join(f"{r} {g} {b}" for r, g, b in row) for row in pixels)pgm_body = "\n".join(" ".join(str(value) for value in row) for row in gray)
Path("synthetic_rgb.ppm").write_text(f"P3\n{width} {height}\n255\n{ppm_body}\n")Path("synthetic_gray.pgm").write_text(f"P2\n{width} {height}\n255\n{pgm_body}\n")
print("size:", (width, height))print("channels:", 3)print("top_left_rgb:", pixels[0][0])print("center_gray:", gray[height // 2][width // 2])print("saved:", "synthetic_rgb.ppm", "synthetic_gray.pgm")
Expected output:
- Size
- (8, 8)
- Channels
- 3
- Top Left Rgb
- (0, 0, 128)
- Center Gray
- 128
- Saved
- synthetic_rgb.ppm synthetic_gray.pgm
Operation tip: change width, height, or the RGB formula. If the saved image changes, you are already doing image preprocessing. Later sections replace this tiny lab with OpenCV, Pillow, PyTorch, and detection or segmentation models.
How to read this output
Section titled “How to read this output”sizeandchannelstell you the shape of the image data before any model sees it.top_left_rgbis a real pixel value, not a description of the picture.center_grayproves that preprocessing changed RGB data into a single grayscale number.- The saved files are evidence artifacts. If you cannot show the before/after files, the preprocessing step is hard to debug.
Depth Ladder
Section titled “Depth Ladder”| Level | What you can prove |
|---|---|
| Minimum pass | You can run the pixel lab and explain image size, channels, RGB values, grayscale conversion, and saved output. |
| Project-ready | You can choose the right task output, keep original, processed, and prediction images, report the right metric, and save failure samples. |
| Deeper check | You can trace a wrong result to data, annotation, preprocessing, model, threshold, metric, or deployment constraint before changing architecture. |
Debug Vision Results
Section titled “Debug Vision Results”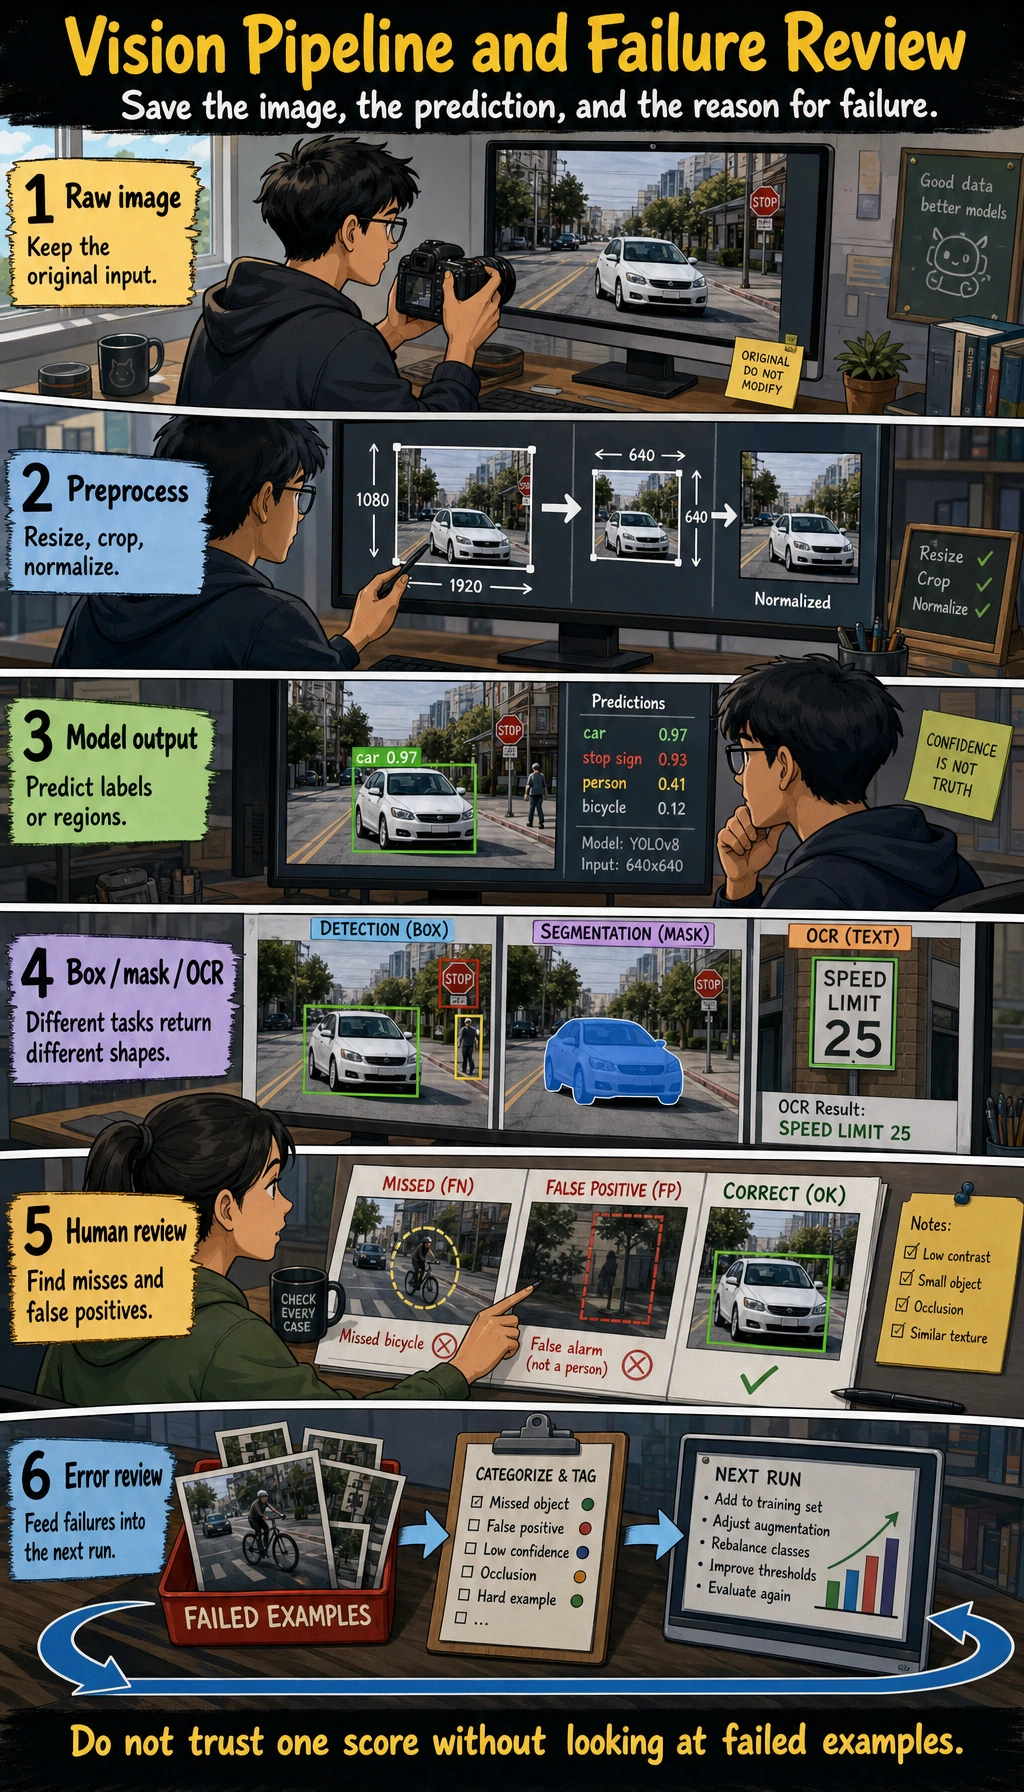
When a vision model is wrong, inspect the input and labels before blaming the architecture.
| Symptom | Print or visualize first | Likely fix |
|---|---|---|
| Classification is unstable | misclassified images and class counts | clean data, rebalance classes, adjust augmentation |
| Small objects are missed | image resolution, boxes, confidence threshold | improve labels, increase resolution, tune threshold |
| Segmentation boundary is rough | mask overlaid on the original image | improve annotation, use suitable IoU/Dice metrics |
| Demo images work but real images fail | lighting, angle, background, camera source | add real samples and scenario notes |
Evidence to Keep
Section titled “Evidence to Keep”Keep this page’s proof of learning as a small evidence card:
- Task Output
- classification label, detection box, segmentation mask, OCR text, or video event
- Artifacts
- original image, processed image, prediction overlay, metrics file, and failure samples
- Metric
- accuracy/F1, mAP, IoU, Dice, latency, or scenario-specific review score
- Failure Check
- data quality, label error, preprocessing mismatch, threshold, or deployment constraint
- Expected Output
- a reproducible run folder with visual outputs and a short failure report
Common Failures
Section titled “Common Failures”- Chasing model names before checking data quality.
- Reporting accuracy without saving failed images.
- Mixing classification, detection, and segmentation outputs.
- Using augmentation that changes the meaning of labels.
- Ignoring deployment constraints such as image size, latency, and device memory.
Pass Check
Section titled “Pass Check”Before leaving this elective, you should be able to:
- explain classification, detection, segmentation, OCR, and visual understanding by their outputs;
- run the pixel lab and explain image size, channel, RGB value, and grayscale value;
- keep input images, processed images, predictions, metrics, and failure samples;
- choose suitable metrics such as accuracy/F1, mAP, IoU, or Dice;
- run the reproducible vision mini pipeline and write a short failure analysis.
For a printable checklist, use 10.0 Learning Checklist. For the guided project, start with 10.6.4 Hands-on: Build a Reproducible Vision Mini Pipeline.
Check reasoning and explanation
- A passing answer maps the task to the right visual output: class label, bounding box, mask, OCR text, embedding, or video event.
- The evidence should include a rendered visual artifact and one metric or qualitative error note.
- A good self-check names one visual failure mode such as class confusion, missed objects, bad masks, lighting shift, domain shift, or weak annotation quality.