1.1.3 Package Managers
Where This Section Fits
This section answers the question: “How do you install and update development tools?” You’ll come to think of package managers as a developer’s app store, learn how to choose Homebrew, winget, apt, and other tools based on your operating system, and build a foundation for installing Git, Python, databases, and deployment tools later.
Learning Objectives
- Understand what a package manager is and why you need one
- Learn to use the package manager that matches your operating system
- Install several basic tools needed for AI development with a package manager
What Is a Package Manager?
When you use your phone and want to install an app, you open the App Store or another app store, search for it, and tap install.
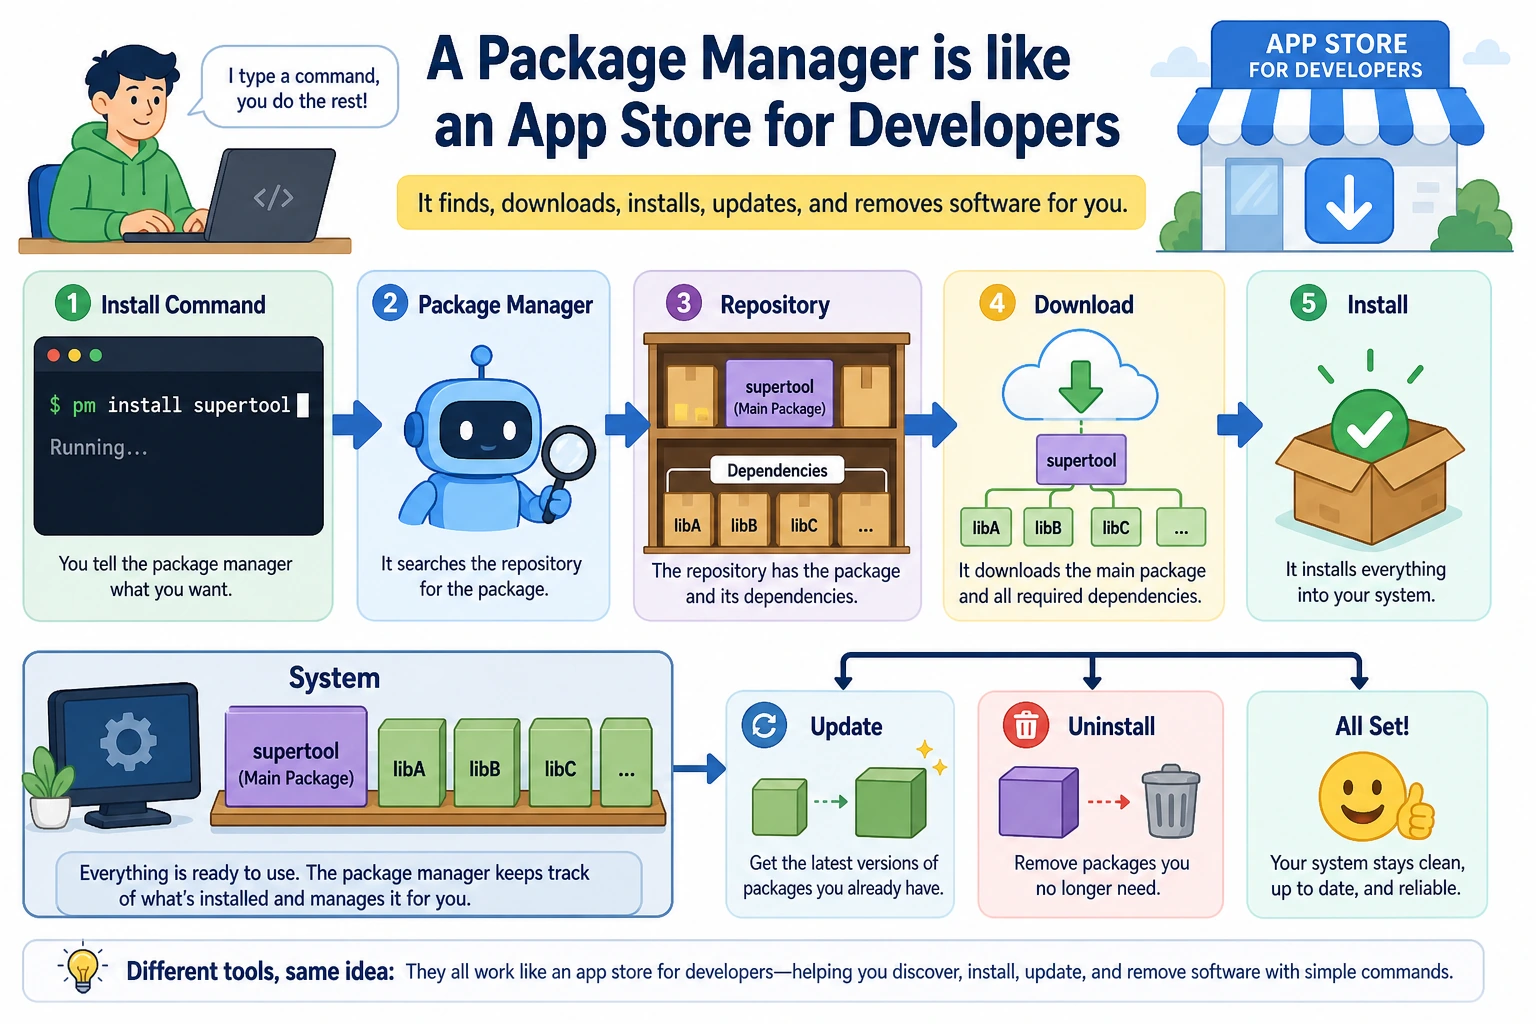
A package manager is the computer equivalent of an app store, but you use it from the command line. It helps you do three things:
- Install software — one command is enough; no need to go to a website and download an installer
- Update software — one command updates all your software to the latest version
- Manage dependencies — automatically handles dependency relationships like “to install A, you must first have B”
Different operating systems have different package managers. Find your system and follow the matching instructions.
macOS: Homebrew
Homebrew is the most popular package manager on macOS, and almost every developer installs it.
Install Homebrew
Open Terminal and paste this command:
/bin/bash -c "$(curl -fsSL https://raw.githubusercontent.com/Homebrew/install/HEAD/install.sh)"
The installation may take a few minutes. If you’re prompted for a password, enter your computer login password (characters won’t appear as you type; that’s normal).
After the installation finishes, verify it:
brew --version
# Output looks like: Homebrew 4.x.x
If downloads are very slow, you can search for “Homebrew Tsinghua mirror” or “Homebrew USTC mirror” and use a domestic mirror for faster downloads.
Common Homebrew Commands
# Search for software
brew search git

# Install software
brew install git
brew install wget
brew install tree

# View installed software
brew list

# Update all software
brew update      # Update Homebrew itself
brew upgrade     # Update all installed software

# Uninstall software
brew uninstall wget

# View software details
brew info git
Install Basic Tools for AI Development with Homebrew
# Git (version control, covered in detail in the next chapter)
brew install git

# tree (shows directories in a tree structure; very useful for understanding project layout)
brew install tree

# wget (a tool for downloading files)
brew install wget
After installing tree, try this:
cd ~/ai-study
tree
The output will look something like:
.
└── ch01-tools
    └── terminal-practice
        ├── data.csv
        ├── hello.py
        ├── notes.txt
        └── notes_backup.txt
This makes the entire directory structure easier to see than ls.
Ubuntu/Debian Linux: apt
apt is the package manager built into Ubuntu and Debian-based Linux systems, so you don’t need to install it separately.
Common apt Commands
# Update package source information (recommended before installing)
sudo apt update

# Install software
sudo apt install git
sudo apt install tree
sudo apt install wget
sudo apt install curl

# Search for software
apt search nodejs

# View installed software
apt list --installed

# Update all software
sudo apt update && sudo apt upgrade

# Uninstall software
sudo apt remove wget
sudo means “run with administrator privileges.” Installing system-level software requires administrator privileges, so you need to add sudo before apt install, and you’ll be asked to enter your password.
Install Basic Tools for AI Development with apt
sudo apt update
sudo apt install -y git tree wget curl build-essential
-y means auto-confirm, so you don’t need to type Y manually. build-essential includes compiler tools, which some Python libraries need during installation.
Windows: winget and Scoop
Windows has two main command-line package managers.
Option 1: winget (recommended, built into Windows)
Windows 10 (1709+) and Windows 11 include winget. Open PowerShell and try:
winget --version
If you see output, it means it’s ready to use.
# Search for software
winget search vscode

# Install software
winget install Git.Git
winget install Microsoft.VisualStudioCode
winget install Python.Python.3.11

# Update all software
winget upgrade --all

# View installed software
winget list
Option 2: Scoop (more Linux-like experience)
If you prefer a more “developer-friendly” tool, you can install Scoop:
# Install Scoop (run in PowerShell)
Set-ExecutionPolicy -ExecutionPolicy RemoteSigned -Scope CurrentUser
irm get.scoop.sh | iex
# How to use it
scoop install git
scoop install python
scoop install tree

# Update
scoop update *
Install Basic Tools for AI Development with winget
winget install Git.Git
winget install Python.Python.3.11
We strongly recommend installing Windows Terminal (search for it in the Microsoft Store). It’s much better to use than the built-in PowerShell window — it supports multiple tabs, better font rendering, and easier copy/paste.
Package Managers vs pip/conda
You might be wondering: we’ll also learn about pip and conda later. Aren’t they package managers too? What’s the difference?
| Tool | What it manages | Analogy |
|---|---|---|
| brew / apt / winget | Operating-system-level software (Git, Python, Node.js, Docker) | Mobile app store |
| pip | Python libraries (numpy, pandas, torch) | A Python-only app store |
| conda | Python environments + Python libraries + some system libraries | A more powerful Python app store |
In short:
- To install Git, Docker, or system tools → use brew / apt / winget
- To install Python libraries → use pip or conda
- To manage Python versions and virtual environments → use conda
These tools each have their own role and do not conflict with each other.
Hands-On Practice
Complete the following exercises based on your operating system:
macOS Users
# 1. Install Homebrew (if you haven’t already)
/bin/bash -c "$(curl -fsSL https://raw.githubusercontent.com/Homebrew/install/HEAD/install.sh)"

# 2. Install tree and wget
brew install tree wget

# 3. Use tree to view the ai-study directory structure you created earlier
tree ~/ai-study

# 4. Try downloading a file with wget
wget https://raw.githubusercontent.com/plotly/datasets/master/iris.csv
cat iris.csv | head -5
Ubuntu Users
# 1. Update package sources
sudo apt update

# 2. Install tree and wget
sudo apt install -y tree wget

# 3. Use tree to view the directory
tree ~/ai-study

# 4. Download a test file
wget https://raw.githubusercontent.com/plotly/datasets/master/iris.csv
head -5 iris.csv
Windows Users
# 1. Confirm that winget is available
winget --version

# 2. Install Git (needed in later chapters)
winget install Git.Git

# 3. Verify the installation
git --version
Chapter Self-Check
Complete the following checks to confirm you understand terminal basics:
- Can open the terminal and know which directory you are in
- Can use
cd,ls,mkdir,touch,cp,mv, andrmto perform basic file operations - Understand the difference between absolute paths and relative paths
- Can use a pipe
|to combine two commands - Can use
>or>>to save output to a file - Can use your package manager to install a piece of software
- Know what
echo $PATHmeans
You’ve now mastered the core skills of the terminal and command line. Next, we’ll learn Git — another essential tool for developers.