
13 オープンソース LLM のデプロイと微調整
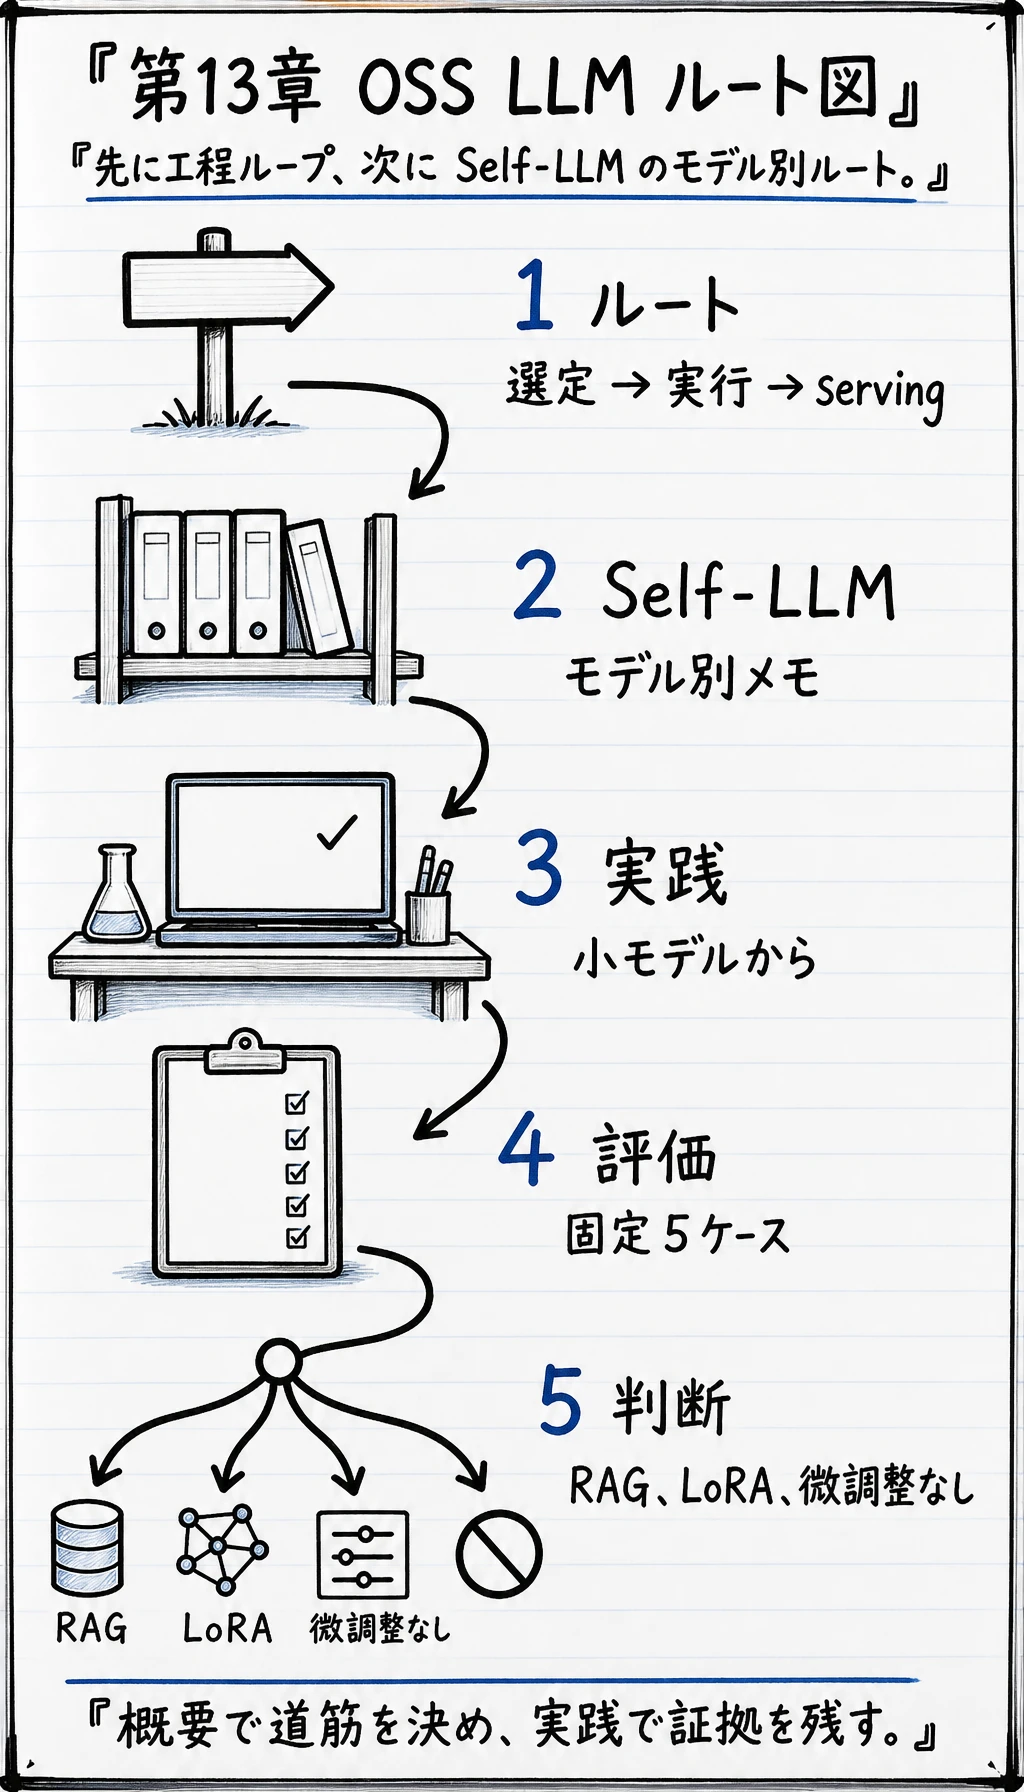
第 13 章では、オープンソース LLM の利用をエンジニアリングワークフローとして扱います。目的はモデル名を集めることではありません。計算ルートを選び、モデルを選び、明確な環境で動かし、安定したインターフェースで公開し、挙動を評価し、他のエンジニアが再現できる証拠を残すことです。
Datawhale Self-LLM は広いモデルと事例のリファレンスとして使えます。この章では、それを学習コースとして進めるために、選択肢を絞り、手順と合格基準を明確にします。
既定の学習ルートは次の通りです。
- 13.1 計算ルート:ローカル CPU、無料 Colab、レンタル GPU
- 13.2 実践:オープンソース LLM を動かしてサービス化する
- 13.3 モデルと Runtime の決定
- 13.4 Serving、評価、Release Runbook
- 13.5 Open-Weight Model Landscape
すぐにコマンドを動かしたい場合でも、まず計算ルートページから始めます。そこで local CPU、利用できる場合の free Colab、または rented GPU のどれを使うかを決めてから command をコピーします。
この章の位置づけ
Section titled “この章の位置づけ”ここまでで、LLM、RAG、Agent のワークフローを作れるようになっています。この章では別の問いを扱います。
モデルがクラウド API ではなく、自分でダウンロード、ホスト、量子化、サービス化、微調整するものになったら何が変わるか?
オープンソース LLM の作業は、多くの場合システム作業です。ハードウェア、ドライバ、モデルファイル、ランタイム、API 契約、ログ、評価ケース、ロールバックを管理する必要があります。
この章で証明すること
Section titled “この章で証明すること”章の終わりには、次の 4 つを証明できるようにします。
| 証明 | 作るもの | なぜ重要か |
|---|---|---|
| 計算ルート | compute_route.md と environment report | local CPU、free Colab、rented GPU のどれで走らせるべきかを示す |
| ランタイム | 初回 model command、prompt、output、API request | model が再実行できる interface を通ることを示す |
| 評価 | 固定 5 ケースの evaluation table | 「一度答えた」と「比較可能に動く」を分ける |
| リリース | README、stop step、rollback note | 他の engineer が引き継げるようにする |
このため、章は普通の model tutorial より厳しめです。open-source LLM は、再実行、検査、停止、比較ができて初めて engineering value を持ちます。
デプロイループ
Section titled “デプロイループ”-
選定 モデル系列、ライセンス、サイズ、コンテキスト長、言語、モダリティを決めます。model card、ライセンスメモ、選定理由を残します。
-
準備 GPU/CPU、CUDA、PyTorch、ディスク、ネットワーク、シークレットを確認します。環境レポートとコスト見積もりを残します。
-
実行 Transformers、Ollama、llama.cpp、vLLM、SGLang、またはプラットフォームのランタイムを選びます。正確なコマンド、モデルパス、最初の応答を残します。
-
サービス化 OpenAI 互換 API、内部 SDK、またはバッチスクリプトとして包みます。request/response サンプルとエラーパスを残します。
-
評価 固定 Prompt、RAG ケース、安全ケース、レイテンシ、コストを確認します。評価表と失敗メモを残します。
-
適応 Prompt、RAG、量子化、LoRA、全パラメータ微調整のどれを使うか決めます。decision memo、adapter artifact、before/after を残します。
-
公開 README、コンテナ、runbook、監視、停止計画をまとめます。デプロイチェックリストとロールバックメモを残します。
学習順序とタスクリスト
Section titled “学習順序とタスクリスト”- 13.1 計算ルート で実行場所を選び、
compute_route.mdに local CPU、free Colab、rented GPU のどれかと理由を書きます。 - 環境を確認し、Python、PyTorch、CUDA/MPS/CPU、disk、reset/rental risk を保存します。
- 13.2 実践 でローカル推論を1回動かし、prompt、output、command、model version を残します。
- API または script として包み、再実行できる request/response と stop command を残します。
- 小さな評価セットを動かし、5つ以上の prompt と pass/fail notes を残します。
- 13.3 モデルと Runtime の決定 で model/runtime を比較し、この pair で十分な理由を書きます。
- 13.4 Serving、評価、Release Runbook で release path をまとめ、README、commands、cost、limits、shutdown を残します。
- 13.5 Open-Weight Model Landscape を読み、route、license、privacy、runtime、evidence から model family を選べるところで止めます。
- 微調整が必要か判断し、no tuning、LoRA、full training の理由を書きます。
この段階の成果物は、compute_route.md、実行できる runbook、環境レポート、open-weight model selection card、5ケース評価表、model/runtime decision memo、shutdown または rollback を含む README です。
Self-LLM との使い分け
Section titled “Self-LLM との使い分け”Self-LLM は、モデル別のリファレンスマニュアルとして使うと強い教材です。この章は engineering loop のテンプレートです。次の順序で組み合わせます。
-
まずこの章で共通の証拠パックを作る environment report、model choice、first run、eval table、API request/response、shutdown step を先にそろえます。
-
次に Self-LLM で具体モデルの道筋を見る Qwen、Llama、ChatGLM、InternLM、Baichuan などに切り替えるとき、対応する model notes で download、inference、tuning を確認します。
-
証拠はこのテンプレートへ戻す どのモデルチュートリアルを参考にしても、
model_decision.md、eval_cases.csv、first_run.md、README.md、shutdown evidence は自分の project に残します。
これにより、「tutorial は動いたが、model、environment、license、evaluation、stop procedure を説明できない」という失敗を避けられます。
モデル選定カード
Section titled “モデル選定カード”モデルを切り替える前に、1枚の選定カードを書きます。「人気があるから」だけで選ばないでください。
| 項目 | 記録すること |
|---|---|
candidate_model | 正確なモデル名。必要なら revision も残す |
model_source | Hub、mirror、local path、internal registry |
license | ライセンスと守るべき利用制限 |
parameter_count_and_quantization | サイズと、使う場合は量子化形式 |
context_length | 今回のタスクで前提にする context window |
language_or_domain_fit | 言語、タスク、ドメインに合う理由 |
estimated_vram_or_ram | 選んだ runtime で必要な memory |
estimated_disk | download と cache に必要な disk |
runtime | Transformers、llama.cpp、Ollama、vLLM、SGLang など |
reason_for_choice | 最初の実行に十分だと言える証拠 |
rejected_models | 検討したが選ばなかった model |
risks | license、privacy、download、VRAM、speed、output quality のリスク |
このカードを埋められない場合は、まだ GPU を借りず、fine-tuning も始めません。
最初に動かすループ:モデル runbook を作る
Section titled “最初に動かすループ:モデル runbook を作る”このオフラインスクリプトはモデルをダウンロードしません。GPU を借りる前、大きなモデルを落とす前に必要な計画習慣を練習します。
ch13_open_llm_runbook.py を作り、Python 3.10 以降で実行します。
import jsonfrom pathlib import Path

project = {    "task": "course assistant",    "privacy": "local documents may be private",    "expected_users": "small internal group",    "latency_target_seconds": 4,    "available_vram_gb": 24,    "needs_fine_tuning": False,}

def choose_runtime(info):    if info["available_vram_gb"] >= 24:        return {            "runtime": "vLLM or SGLang",            "model_size": "7B to 14B instruct model",            "why": "enough VRAM for a practical server and OpenAI-compatible API",        }    if info["available_vram_gb"] >= 8:        return {            "runtime": "Transformers or Ollama",            "model_size": "1B to 7B instruct model, possibly quantized",            "why": "simpler setup and acceptable for a small lab",        }    return {        "runtime": "CPU quantized runtime or cloud API fallback",        "model_size": "small quantized model",        "why": "local GPU memory is too limited for serving a larger model",    }

def choose_adaptation(info):    if info["needs_fine_tuning"]:        return "prepare a LoRA experiment with a fixed eval set first"    if info["privacy"] == "local documents may be private":        return "try RAG before fine-tuning"    return "start with prompt and decoding settings"

plan = {    "project": project["task"],    "runtime_choice": choose_runtime(project),    "adaptation_choice": choose_adaptation(project),    "minimum_evidence": [        "environment report",        "model card and license note",        "first prompt/output",        "five-case evaluation table",        "latency and memory note",        "shutdown or rollback step",    ],}
Path("open_llm_runbook.json").write_text(json.dumps(plan, indent=2), encoding="utf-8")print(json.dumps(plan, indent=2))
期待される出力:
{ "project": "course assistant", "runtime_choice": { "runtime": "vLLM or SGLang", "model_size": "7B to 14B instruct model", "why": "enough VRAM for a practical server and OpenAI-compatible API" }, "adaptation_choice": "try RAG before fine-tuning", "minimum_evidence": [ "environment report", "model card and license note", "first prompt/output", "five-case evaluation table", "latency and memory note", "shutdown or rollback step" ]}この出力がデプロイ runbook の原型です。大きなモデルを動かす前に、VRAM、プライバシー要件、タスク、微調整フラグを変更してください。
Runbook を一段ずつ読む
Section titled “Runbook を一段ずつ読む”-
project = {...}これはプロジェクト制約カードです。「model を動かしたい」をハードウェア、プライバシー、ユーザー、レイテンシ、調整要件に分けます。まずtask、privacy、available_vram_gb、needs_fine_tuningを変えます。 -
choose_runtime(info)これはランタイム決定ルールです。メモリを確認する前に GPU を借りたり model をダウンロードしたりするのを防ぎます。実際の instance または local machine が分かってから VRAM threshold を調整します。 -
choose_adaptation(info)これは微調整ゲートです。private knowledge は普通、training の前に RAG を試します。fixed eval cases が繰り返し失敗するときだけneeds_fine_tuningをTrueにします。 -
plan = {...}これは model choice、runtime choice、required evidence をつなぐ deployment checklist です。auth、logging、rollback など project 固有の evidence を追加します。 -
write_text(...)とprint(...)この2行は同じ plan を disk と terminal output に残し、後で review できるようにします。open_llm_runbook.jsonを experiment notes と一緒に保存します。
各行を説明できれば、この script は理解できています。曖昧な行があれば、GPU に触る前に project card を編集してもう一度実行してください。
最小環境チェック
Section titled “最小環境チェック”モデルをダウンロードする前に実行します。
python -Vpython - <<'PY'import platformtry: import torch print("torch:", torch.__version__) print("cuda:", torch.cuda.is_available()) print("device:", torch.cuda.get_device_name(0) if torch.cuda.is_available() else "cpu")except Exception as exc: print("torch check failed:", repr(exc))print("platform:", platform.platform())PY出力を保存します。環境が見えない状態では、モデル結果も再現できません。
GPU を借りるときの閉ループ
Section titled “GPU を借りるときの閉ループ”借りた GPU は短い実験として扱い、恒久的な computer として扱いません。まずは無料または追加費用のない道を確認します。local quantized model、学校や会社の GPU、notebook platform の無料枠が使えるなら先に使います。足りない場合だけ、1つの model/runtime loop を証明する時間だけ借ります。
-
run を定義する target model size、runtime、最初の prompt、最大 rental time を書きます。証拠は
gpu_plan.md、stop time、budget guardrail です。 -
instance を選ぶ Linux、十分な VRAM、十分な disk、SSH access があるものを選びます。証拠は instance type、VRAM、disk、hourly price note です。
-
access を閉じる SSH key を使い、model API は default private、必要な port だけ開きます。証拠は security note と exposed ports です。
-
environment を準備する
python -V、torch/CUDA check、可能ならnvidia-smiと disk check を実行します。証拠はenvironment_report.txtです。 -
1つの model path を通す model をダウンロードまたは mount し、1つの prompt を実行し、command、output、failure notes を保存します。証拠は
first_run.mdです。 -
stop して archive する runbook、logs、eval cases、README を project に戻し、instance を stop または destroy します。証拠は shutdown screenshot または stop note です。
一番大事な command は最後の stop かもしれません。実験が成功しても、課金が静かに続くなら engineering failure です。
Runtime の選び方
Section titled “Runtime の選び方”Transformers
学習、debug、custom Python pipeline に向いています。すぐに高スループット serving が必要なら、最終サーバーとしては避けます。
Ollama / LM Studio
local demo、laptop test、非エンジニアへの受け渡しに向いています。production の細かい制御が必要なら避けます。
llama.cpp
CPU または quantized edge experiment に向いています。標準的な GPU server 機能が必要なら避けます。
vLLM
OpenAI-compatible な高スループット API に向いています。GPU や依存関係がまだ整っていないなら避けます。
SGLang
structured generation、serving、agentic workloads に向いています。最初の単純な実行だけが目的なら避けます。
Cloud model API
運用負荷の低い product prototype に向いています。privacy、cost、latency が local control を要求するなら避けます。
まずは product behavior を証明できる最も単純な runtime を使います。latency、cost、privacy、throughput が必要になったときだけ upgrade します。
Fine-Tuning 判断
Section titled “Fine-Tuning 判断”1回の悪い回答だけで fine-tune しないでください。
private knowledge が足りない
先に RAG を試します。retrieval は正しいが挙動がまだ間違う場合だけ、fine-tune を考えます。
出力形式が不安定
先に schema、parser、examples を試します。固定ケースで大量に失敗する場合だけ、fine-tune を考えます。
tone や role が違う
先に system prompt と examples を調整します。同じ style 問題が多くの例で繰り返す場合だけ、fine-tune を考えます。
domain terms が弱い
先に glossary、RAG、few-shot を試します。高品質な domain examples が十分ある場合だけ、fine-tune を考えます。
遅い、または高い
先に small model、quantization、batching を試します。挙動は良いが runtime 制約を満たせない場合だけ、学習ルートに進みます。
多くのコースプロジェクトでは、LoRA が最初の本格的な適応方法です。Full fine-tuning は後の engineering choice であり、default ではありません。
このページを終えたら、この証拠カードを残します。
- モデル選択
- model、size、license、選定理由
- runtime 選択
- Transformers/Ollama/llama.cpp/vLLM/SGLang/API と理由
- 環境情報
- Python、torch、CUDA/device、disk、cost estimate
- 初回実行
- exact command、prompt、output、latency、memory note
- 適応判断
- Prompt/RAG/quantization/LoRA/full fine-tune の選択
- 期待成果
- runbook、evaluation table、README、rollback または shutdown note
よくある失敗
Section titled “よくある失敗”- disk、network、VRAM を確認する前に大きなモデルをダウンロードする。
- 1回の chat response 成功を deployment evidence とみなす。
- model license や data-use restriction を無視する。
- fixed before/after eval set なしで fine-tune する。
- auth、logging、shutdown rules なしで local model server を公開する。
- 実験後に rented GPU を止め忘れる。
1つのプロジェクトに対して model/runtime pair を選び、environment check を動かし、open_llm_runbook.json を作り、次に Prompt、RAG、quantization、LoRA、full fine-tuning のどれを選ぶべきか説明し、他のエンジニアが従える README コマンドを書ければ合格です。