
1.1.3 Package Managers
Where This Section Fits
Section titled “Where This Section Fits”This section answers the question: “How do you install and update development tools?” You’ll come to think of package managers as a developer’s app store, learn how to choose Homebrew, winget, apt, and other tools based on your operating system, and build a foundation for installing Git, Python, databases, and deployment tools later.
Learning Objectives
Section titled “Learning Objectives”- Understand what a package manager is and why you need one
- Learn to use the package manager that matches your operating system
- Install several basic tools needed for AI development with a package manager
What Is a Package Manager?
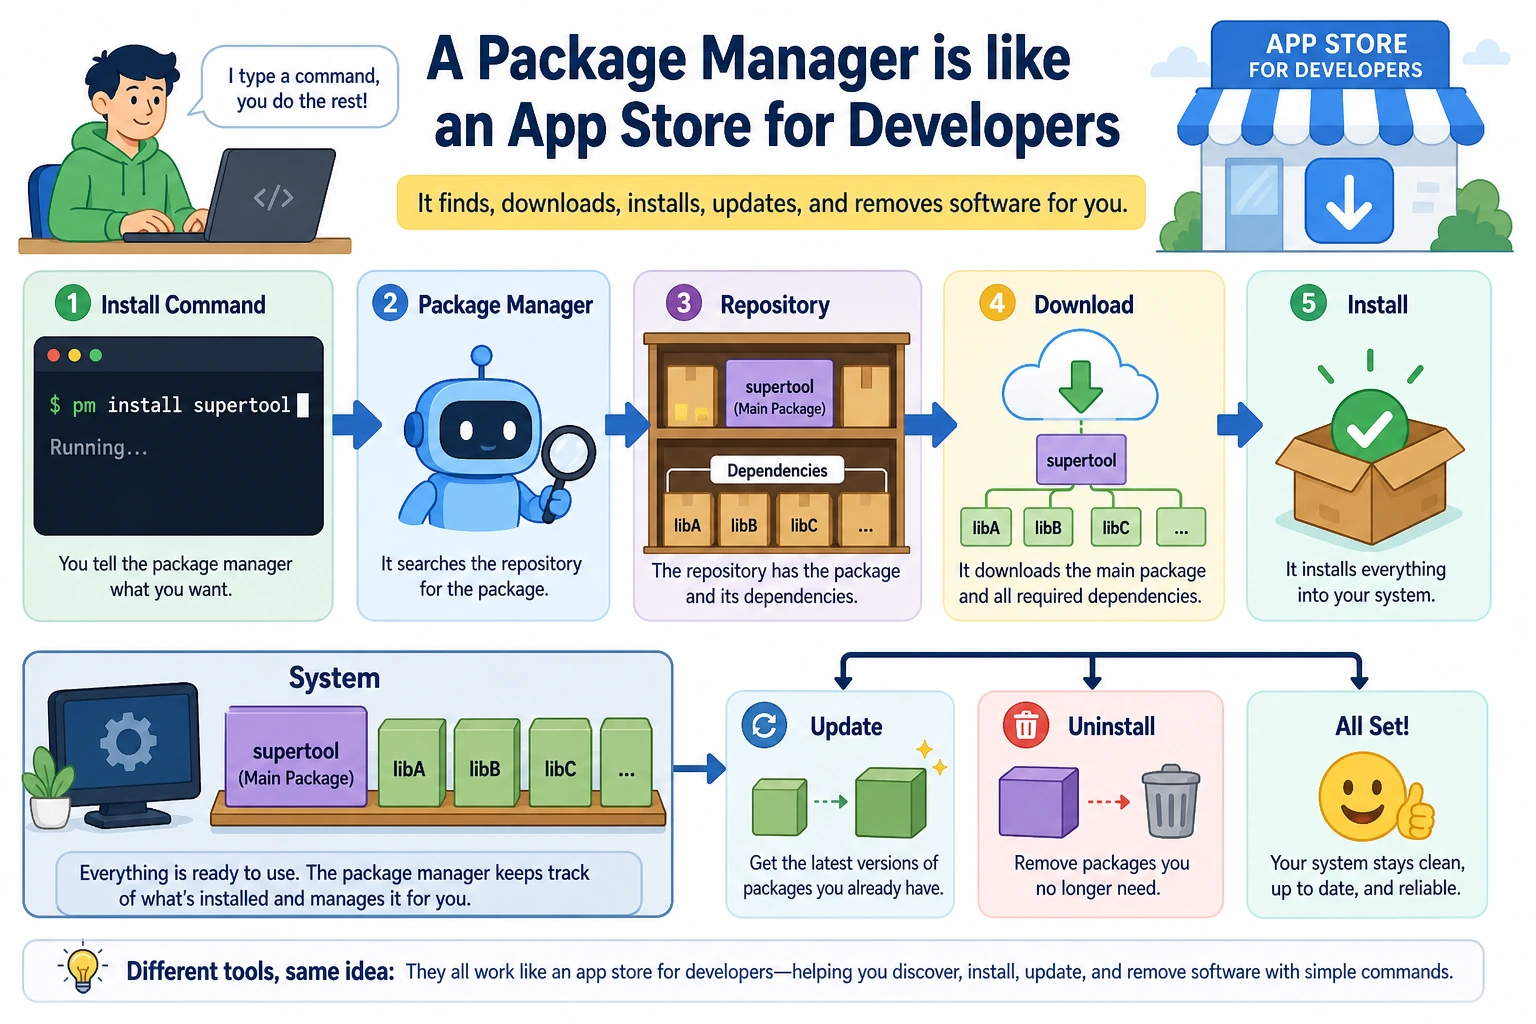
Section titled “What Is a Package Manager?”When you use your phone and want to install an app, you open the App Store or another app store, search for it, and tap install.
A package manager is the computer equivalent of an app store, but you use it from the command line. It helps you do three things:
- Install software — one command is enough; no need to go to a website and download an installer
- Update software — one command updates all your software to the latest version
- Manage dependencies — automatically handles dependency relationships like “to install A, you must first have B”
Different operating systems have different package managers. Find your system and follow the matching instructions.
macOS: Homebrew
Section titled “macOS: Homebrew”Homebrew is the most popular package manager on macOS, and almost every developer installs it.
Install Homebrew
Section titled “Install Homebrew”Open Terminal and paste this command:
/bin/bash -c "$(curl -fsSL https://raw.githubusercontent.com/Homebrew/install/HEAD/install.sh)"The installation may take a few minutes. If you’re prompted for a password, enter your computer login password (characters won’t appear as you type; that’s normal).
After the installation finishes, verify it:
brew --version# Output looks like: Homebrew 4.x.xCommon Homebrew Commands
Section titled “Common Homebrew Commands”# Search for softwarebrew search git
# Install softwarebrew install gitbrew install wgetbrew install tree
# View installed softwarebrew list
# Update all softwarebrew update # Update Homebrew itselfbrew upgrade # Update all installed software
# Uninstall softwarebrew uninstall wget
# View software detailsbrew info gitInstall Basic Tools for AI Development with Homebrew
Section titled “Install Basic Tools for AI Development with Homebrew”# Git (version control, covered in detail in the next chapter)brew install git
# tree (shows directories in a tree structure; very useful for understanding project layout)brew install tree
# wget (a tool for downloading files)brew install wgetAfter installing tree, try this:
cd ~/ai-studytreeThe output will look something like:
.└── ch01-tools └── terminal-practice ├── data.csv ├── hello.py ├── notes.txt └── notes_backup.txtThis makes the entire directory structure easier to see than ls.
Ubuntu/Debian Linux: apt
Section titled “Ubuntu/Debian Linux: apt”apt is the package manager built into Ubuntu and Debian-based Linux systems, so you don’t need to install it separately.
Common apt Commands
Section titled “Common apt Commands”# Update package source information (recommended before installing)sudo apt update
# Install softwaresudo apt install gitsudo apt install treesudo apt install wgetsudo apt install curl
# Search for softwareapt search nodejs
# View installed softwareapt list --installed
# Update all softwaresudo apt update && sudo apt upgrade
# Uninstall softwaresudo apt remove wgetInstall Basic Tools for AI Development with apt
Section titled “Install Basic Tools for AI Development with apt”sudo apt updatesudo apt install -y git tree wget curl build-essential-y means auto-confirm, so you don’t need to type Y manually. build-essential includes compiler tools, which some Python libraries need during installation.
Windows: winget and Scoop
Section titled “Windows: winget and Scoop”Windows has two main command-line package managers.
Option 1: winget (recommended, built into Windows)
Section titled “Option 1: winget (recommended, built into Windows)”Windows 10 (1709+) and Windows 11 include winget. Open PowerShell and try:
winget --versionIf you see output, it means it’s ready to use.
# Search for softwarewinget search vscode
# Install softwarewinget install Git.Gitwinget install Microsoft.VisualStudioCodewinget install Python.Python.3.11
# Update all softwarewinget upgrade --all
# View installed softwarewinget list
Option 2: Scoop (more Linux-like experience)
Section titled “Option 2: Scoop (more Linux-like experience)”If you prefer a more “developer-friendly” tool, you can install Scoop:
# Install Scoop (run in PowerShell)Set-ExecutionPolicy -ExecutionPolicy RemoteSigned -Scope CurrentUserirm get.scoop.sh | iex# How to use itscoop install gitscoop install pythonscoop install tree
# Updatescoop update *Install Basic Tools for AI Development with winget
Section titled “Install Basic Tools for AI Development with winget”winget install Git.Gitwinget install Python.Python.3.11Package Managers vs pip/conda
Section titled “Package Managers vs pip/conda”You might be wondering: we’ll also learn about pip and conda later. Aren’t they package managers too? What’s the difference?
| Tool | What it manages | Analogy |
|---|---|---|
| brew / apt / winget | Operating-system-level software (Git, Python, Node.js, Docker) | Mobile app store |
| pip | Python libraries (numpy, pandas, torch) | A Python-only app store |
| conda | Python environments + Python libraries + some system libraries | A more powerful Python app store |
In short:
- To install Git, Docker, or system tools → use brew / apt / winget
- To install Python libraries → use pip or conda
- To manage Python versions and virtual environments → use conda
These tools each have their own role and do not conflict with each other.
Hands-On Practice
Section titled “Hands-On Practice”Complete the following exercises based on your operating system:
macOS Users
Section titled “macOS Users”# 1. Install Homebrew (if you haven’t already)/bin/bash -c "$(curl -fsSL https://raw.githubusercontent.com/Homebrew/install/HEAD/install.sh)"
# 2. Install tree and wgetbrew install tree wget
# 3. Use tree to view the ai-study directory structure you created earliertree ~/ai-study
# 4. Try downloading a file with wgetwget https://raw.githubusercontent.com/plotly/datasets/master/iris.csvcat iris.csv | head -5Ubuntu Users
Section titled “Ubuntu Users”# 1. Update package sourcessudo apt update
# 2. Install tree and wgetsudo apt install -y tree wget
# 3. Use tree to view the directorytree ~/ai-study
# 4. Download a test filewget https://raw.githubusercontent.com/plotly/datasets/master/iris.csvhead -5 iris.csvWindows Users
Section titled “Windows Users”# 1. Confirm that winget is availablewinget --version
# 2. Install Git (needed in later chapters)winget install Git.Git
# 3. Verify the installationgit --versionChapter Self-Check
Section titled “Chapter Self-Check”Complete the following checks to confirm you understand terminal basics:
- Can open the terminal and know which directory you are in
- Can use
cd,ls,mkdir,touch,cp,mv, andrmto perform basic file operations - Understand the difference between absolute paths and relative paths
- Can use a pipe
|to combine two commands - Can use
>or>>to save output to a file - Can use your package manager to install a piece of software
- Know what
echo $PATHmeans
Check reasoning and explanation
- Run only the section for your operating system.
brew,apt, andwingetmanage different platforms. - A successful
tree ~/ai-studyproves both that the tool was installed and that your shell can find it throughPATH. wget ... iris.csvshould create a local CSV file, and the first few lines should show a header plus data rows. If the network is blocked, record the error and verify thatwget --versionworks.- On Windows,
git --versionis enough for this exercise. Ifwingetinstalls Git but the command is not found, reopen the terminal. echo $PATHexplains why a command can be installed but still not discoverable by the shell.
Evidence to Keep
Section titled “Evidence to Keep”Keep this page’s proof of learning as a small evidence card:
- Command
- exact terminal command you ran
- Working Dir
- pwd/current folder and important files listed
- Output
- copied command output or screenshot of the result
- Failure Check
- wrong path, missing command, permission issue, or shell mismatch
- Expected Output
- reproducible terminal action with the command and result side by side